Grab your coffee and clear the workbench because we are about to dive into the visceral world of green woodworking. There is a specific, electric thrill that comes from holding a raw billet of cherry or walnut and realizing it contains the perfect vessel for your morning oats. Making Handmade Wooden Spoons is not just a weekend craft; it is a high stakes negotiation with the cellular structure of a living organism. When you first press your thumb against the grain, you are feeling the lignin and cellulose fibers that once transported water hundreds of feet into the sky. It is dense, it is stubborn, and it smells like a forest floor after a rainstorm. We are looking for that sweet spot where the wood is still slightly "green" or wet, which reduces the shear strength required to make a clean cut. If the wood is too dry, you are basically fighting a brick; if it is too wet, the fibers will crush rather than slice. We are going for a tactile masterpiece that balances tensile strength with a delicate, ergonomic sweep.
THE STUDIO KIT
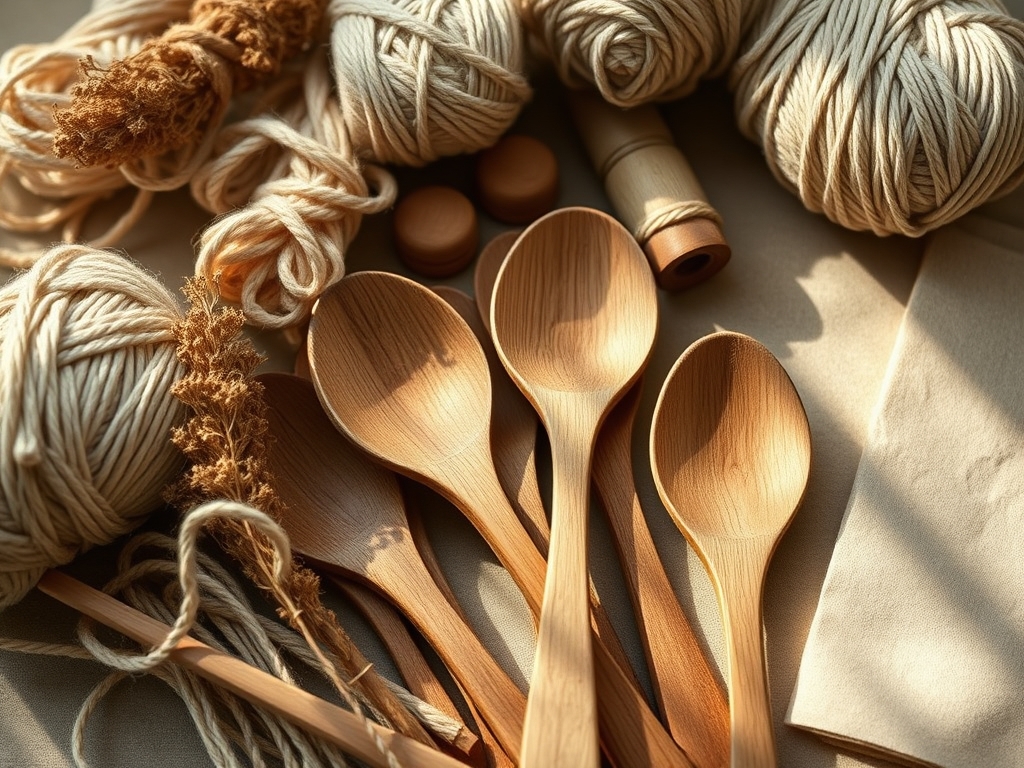
To master the art of Handmade Wooden Spoons, you need a kit that respects the anisotropy of wood. This means the material has different strengths in different directions. You will need a carving axe with a thin bit for the initial "roughing out" phase. This is followed by a straight carving knife (Sloyd knife) for the exterior geometry and a hook knife (or spoon mule) for the concavity of the bowl. Do not forget your digital calipers to ensure the bowl thickness remains consistent; if one side is thinner, the wood will warp unevenly as it dries.
For the material, choose hardwoods like Birch, Cherry, or Maple. These possess a high Janka hardness rating, ensuring they can withstand the thermal shock of boiling soups. Material Substitutions: If you cannot find green logs, you can use kiln-dried lumber, but you must soak it in water for 24 hours to restore some elasticity to the fibers. For finishing, avoid polyurethane; use a polymerizing oil like raw linseed or tung oil that penetrates the porous surface to create a hydrophobic barrier from within.
THE TEMPO
The "Maker's Rhythm" is a three phase cycle: The Burst, The Refinement, and The Cure. The Burst (Step 1 to 3) takes about 45 minutes and is high energy, involving heavy axe work to remove bulk. The Refinement (Step 4 to 6) is the meditative phase, taking roughly two hours of precision knife work where you focus on the grain orientation. Finally, The Cure is the silent phase. Your spoon needs to dry slowly over 3 to 5 days. If you rush this by putting it near a heater, the capillary action will pull moisture out too fast, causing the wood to check or split. Patience is a technical requirement here.
THE CORE METHOD
1. Mapping the Billet
Start by splitting your log through the pith to avoid the highest tension center of the tree. Use an awl to mark your centerline. You must align the bowl of the spoon with the straightest grain possible to maximize longitudinal integrity. If the grain "runs out" through the side of the handle, that is a structural failure point waiting to happen.
Mastery Tip: Observe the growth rings. By placing the bowl of the spoon toward the outer sapwood and the handle toward the heartwood, you utilize the natural density gradients of the tree to create a more durable tool.
2. The Axe Foundation
Hold the wood firmly and use short, controlled swings to remove the "corners" of your rectangular billet. You are looking to create a "crank," which is the angle between the handle and the bowl. This angle is vital for ergonomics; a flat spoon is a useless spoon for deep pots.
Mastery Tip: Use the mechanical advantage of the axe head weight. Do not "hit" the wood; let the gravity of the tool do the work to prevent fatigue and "white knuckle" vibration in your joints.
3. Hollowing the Bowl
This is where the hook knife comes out. Start in the center and work toward the edges, carving across the grain. If you carve with the grain here, the blade will dive too deep and potentially split the entire piece in half.
Mastery Tip: This is all about surface tension. By creating a smooth, concave arc, you ensure that liquids will flow evenly out of the spoon rather than pooling in micro-ridges left by a dull blade.
4. Refining the Profile
Switch to your Sloyd knife. Use "thumb-pushes" and "pull-strokes" to thin the handle. You want a tapering geometry. A thicker neck near the bowl provides structural reinforcement, while a thinner end on the handle reduces the overall weight and improves the balance.
Mastery Tip: Check your progress with calipers. Aim for a uniform thickness of 3mm to 4mm in the bowl. Any thicker and it feels clunky; any thinner and it becomes brittle when exposed to heat.
5. The Faceting Phase
Instead of sanding immediately, use a razor-sharp knife to create small, flat facets along the handle. This is a hallmark of professional Handmade Wooden Spoons. These flats provide a better grip when your hands are covered in olive oil or flour.
Mastery Tip: Clean cuts seal the vascular bundles of the wood. Sanding actually "tears" the fibers at a microscopic level, whereas a sharp blade shears them flat, making the wood more water-resistant.
6. Burnishing for Density
Take a smooth stone or a bone folder and rub it vigorously over the surface of the wood. This is called burnishing. You are physically compressing the surface cells, making the wood denser and giving it a natural, glass-like sheen without any chemicals.
Mastery Tip: This process utilizes friction-generated heat to soften the lignin, allowing you to "smear" the wood fibers into a tighter, more hydrophobic matrix.
7. The Oil Immersion
Once the spoon is bone dry, submerge it in food-grade mineral oil or a beeswax blend. The oil will travel through the intercellular spaces via capillary action, replacing air with a stable fat that prevents water from entering and causing rot.
Mastery Tip: Warm the oil slightly before application. This reduces the viscosity, allowing the oil to penetrate deeper into the heartwood for long-term stabilization.
THE TECHNICAL LEDGER
Maintenance & Longevity: Never put your spoon in the dishwasher. The high heat and harsh detergents will strip the natural oils and cause the fibers to expand and "fur up." Re-oil your spoon whenever the wood looks "thirsty" or pale.
Material Variations:
- Sustainable: Fruitwoods like Apple or Pear are often discarded after orchard pruning and offer incredible density.
- Premium: Black Walnut provides a high-contrast aesthetic and natural rot resistance due to its juglone content.
The Correction:
- The Grain Tear: If the knife catches and rips the wood, you are carving against the grain. Reverse your direction immediately.
- The Flat Bowl: If your bowl is too shallow, use a round rasp to deepen the center before returning to the hook knife.
- The Fuzzy Surface: If the wood feels hairy after drying, use a "cabinet scraper" rather than sandpaper to achieve a surgical finish.
Studio Organization: Store your unfinished spoons in a paper bag filled with their own wood shavings. This creates a micro-climate that slows down evaporation, preventing the wood from cracking before you can finish the fine carving.
THE FINAL REVEAL
Look at that silhouette! Your finished piece should feel like an extension of your own hand. The way the light catches the facets and the deep, rich glow of the oil-soaked grain is proof of your technical mastery. These Handmade Wooden Spoons are not just kitchen tools; they are engineered artifacts designed to survive decades of daily cooking. You have successfully turned a piece of a tree into a functional sculpture. Now, go make some risotto and put that masterpiece to work!
STUDIO QUESTIONS
What is the best wood for beginners?
Birch is the gold standard for beginners. It has a very consistent grain density and is soft enough to carve easily while green, yet it dries into a very durable, neutral-tasting cooking tool that resists splintering.
Why does my spoon feel rough after washing?
This is called "grain raise." When water hits the wood, the crushed fibers from sanding stand up. To fix this, wet the spoon, let it dry, and then perform a final burnishing with a smooth stone to compress them forever.
How do I prevent the wood from cracking?
Cracking, or checking, happens when the exterior dries faster than the interior. Keep your project away from direct sunlight and "slow-dry" it in a bag of its own wet shavings to equalize the moisture gradient during the curing process.
Can I use wood from my backyard?
Absolutely, as long as it is a non-toxic hardwood. Avoid "evergreens" like pine or fir, as their resin canals contain sap that tastes like turpentine and will ruin any food the spoon touches. Stick to deciduous trees.