
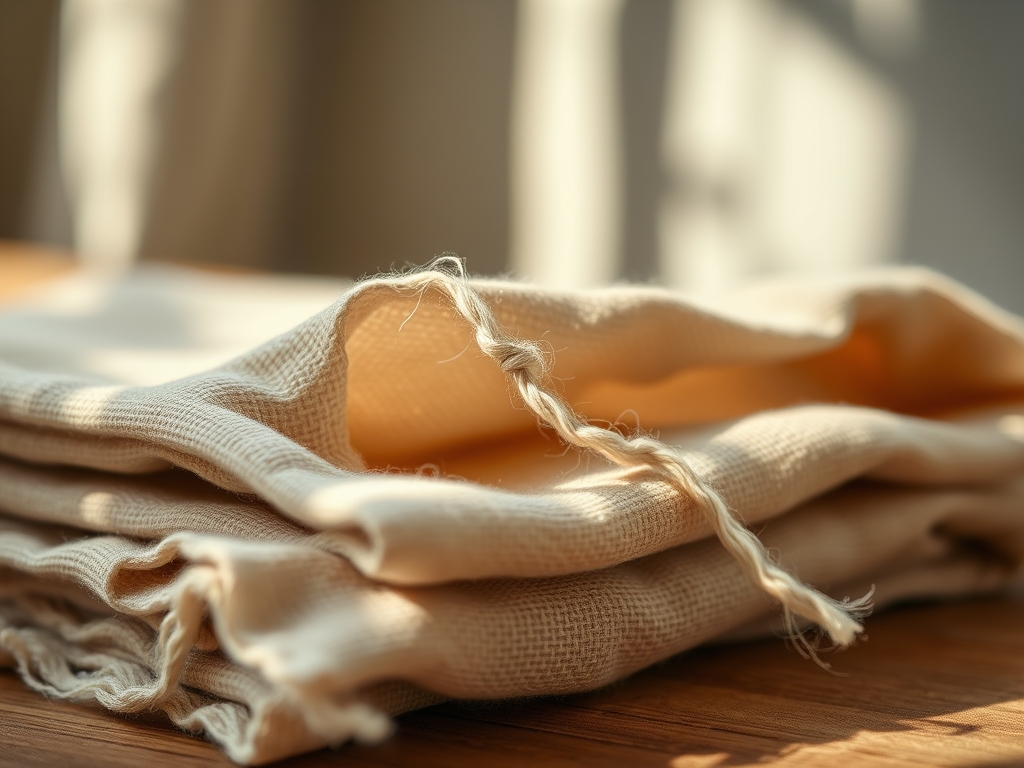
Imagine the crisp, cool weight of raw flax sliding through your fingers as you prepare to create your first set of Handmade Linen Napkins. There is a specific, tactile thrill in feeling the irregular slubs of the weave; it is a reminder that you are working with a cellulose fiber that has been celebrated for millennia. Linen is not just a fabric; it is a high-performance material with incredible tensile strength and a porous structure that makes it the ultimate companion for daily family meals. When you hold a fresh bolt of mid-weight linen, you are feeling the result of complex retting and scutching processes that isolate the long, durable fibers of the flax plant. We are about to transform this raw potential into a functional masterpiece that will only get softer and more absorbent with every single wash. Grab your favorite mug of coffee and clear off the cutting table. We are diving deep into the physics of the perfect fold and the structural integrity of the hemmed edge.
THE STUDIO KIT
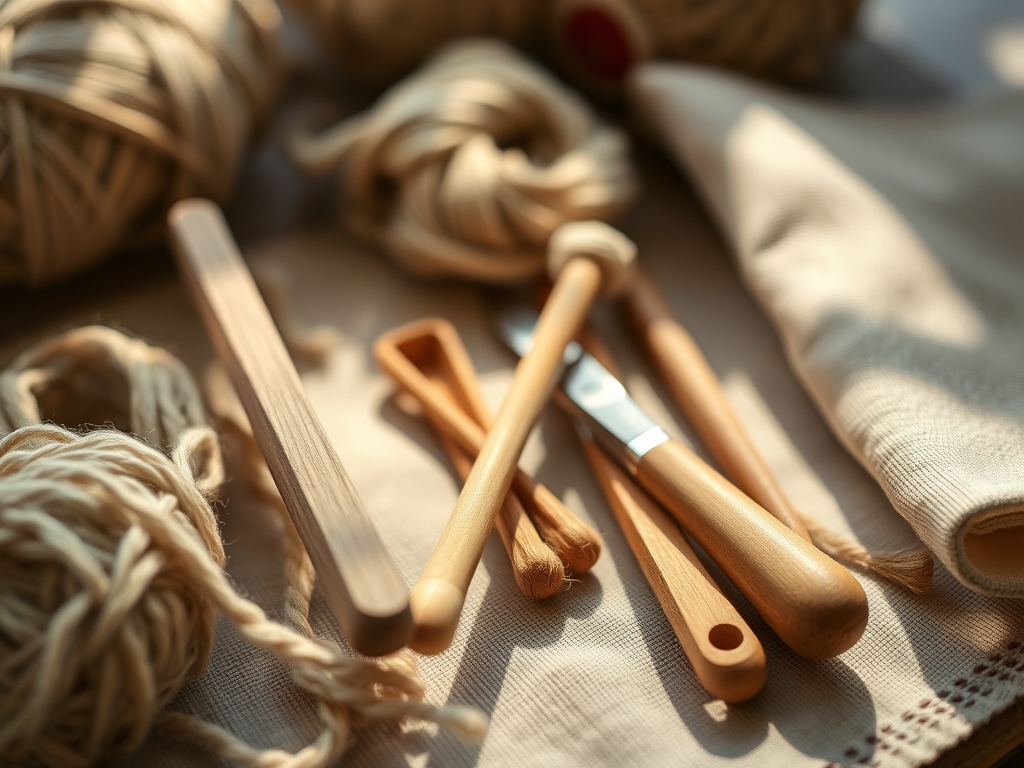
To achieve professional results, you need more than just a standard sewing kit; you need precision instruments that respect the grain of the textile. Start with a rotary cutter and a self-healing mat. Unlike shears, a rotary blade applies downward pressure that prevents the shifting of the loose linen weave, ensuring your squares are perfectly orthogonal. You will also need a bone folder or a heavy-duty tailor's clapper. These tools allow you to burnish the folds, using mechanical pressure to compress the fibers into a permanent crease without relying solely on heat. For measurements, skip the flimsy tape and use a metal sewing gauge or even a pair of calipers if you are feeling particularly pedantic about your corner depths.
In terms of materials, look for a 100 percent linen with a weight of approximately 5.3 to 7.1 ounces per square yard. This provides the ideal balance of drape and durability. If you need a material substitution, hemp is a fantastic sustainable alternative with similar antimicrobial properties and high tensile strength. Avoid polyester blends; synthetic fibers lack the capillary action required to actually wick moisture away from the skin, rendering them functionally inferior for a dinner setting.
THE TEMPO
The "Maker's Rhythm" is all about managing the friction between your ambition and the clock. Creating a set of four Handmade Linen Napkins typically follows a three-phase timeline. The first phase is the Stabilization Phase, which takes about 45 minutes. This includes pre-washing to account for the initial 3 to 5 percent shrinkage and the subsequent grain-straightening. You cannot skip this; linen is a living fiber that needs to find its "home" before you lock it down with stitches.
The second phase is the Precision Prep, requiring roughly 10 minutes per napkin. This is where you measure, cut, and burnish your hems. Finally, the Assembly Phase takes about 15 minutes per piece for basic hems. Total studio time for a full set is approximately three hours. By working in a batch process—cutting all pieces first, then pressing all pieces—you leverage muscle memory and maintain a consistent tension across the entire project.
THE CORE METHOD
1. The Classic Double-Fold Hem
This is the gold standard for durability. You will fold the raw edge over by a quarter inch, then fold again by another half inch. This encases the raw edge completely, preventing any fraying during high-heat laundering cycles.
Mastery Tip: This method relies on mechanical encapsulation. By burying the raw edge within two layers of fabric, you protect the loose weave from the abrasive forces of the washing machine, ensuring the napkin lasts for decades rather than months.
2. The Frayed Edge with Stay-Stitching
For a rustic, tactile look, you can leave the edges raw but controlled. Measure one inch from the edge and sew a straight line around the perimeter. Then, manually pull the cross-threads until you reach the stitch line.
Mastery Tip: The stay-stitch acts as a structural dam. It interrupts the capillary fraying that would otherwise travel toward the center of the napkin, effectively locking the weave while allowing the aesthetic fringe to remain soft.
3. The Mitered Corner Hem
This is the peak of napkin engineering. By cutting a small triangle out of the corner and folding the edges to meet at a 45-degree angle, you eliminate the bulk that usually accumulates where hems overlap.
Mastery Tip: Mitering reduces the material density at the corners. High-density corners are difficult for domestic needles to penetrate and often lead to skipped stitches or uneven tension; a mitered corner ensures a flat, professional profile.
4. The Narrow Rolled Hem
If you have a serger or a specialized presser foot, the rolled hem uses a high-density zigzag stitch to wrap the edge of the fabric in thread. This is excellent for lightweight linens that need a delicate finish.
Mastery Tip: This technique utilizes thread-wrapping physics. By increasing the stitch density, you are essentially creating a flexible plastic-like border out of polyester or cotton thread that reinforces the delicate flax fibers.
5. The Contrast Top-Stitch Hem
Follow the double-fold method but use a heavy-gauge top-stitching thread in a contrasting color. This draws the eye to the geometry of the piece.
Mastery Tip: Heavier thread has a higher denier, meaning it sits on top of the fabric rather than sinking in. This creates a structural rib that adds a slight stiffness to the edge, helping the napkin hold its shape when folded into complex decorative forms.
6. The Hemstitched Border
For those who love vintage details, the hemstitch involves pulling specific threads out of the weave and grouping the remaining vertical threads with decorative embroidery.
Mastery Tip: This is an exercise in structural subtraction. By removing the horizontal "weft" threads, you create a controlled weakness in the fabric that is then reinforced by your embroidery, resulting in a beautiful, lace-like transparency.
THE TECHNICAL LEDGER
To ensure the longevity of your Handmade Linen Napkins, you must understand the chemistry of the fiber. Linen is highly resistant to alkalis but can be damaged by prolonged exposure to acidic bleaches. Always use a pH-neutral detergent. When it comes to storage, avoid plastic bins; linen needs to breathe to prevent the "yellowing" caused by trapped gases. Store them flat in a cool, dry drawer lined with acid-free paper.
The Correction: Common Failures
- The Wave: If your hem looks wavy, you have stretched the bias during sewing. Fix: Use a walking foot to ensure even feed-dog pressure on both the top and bottom layers.
- The Corner Lump: If your machine gets stuck at the corners, you are dealing with too much bulk. Fix: Use an awl to tuck the raw edges deeper into the miter before the final stitch.
- The Thread Snap: If the thread breaks during use, your tension was too high. Fix: Lower the bobbin tension slightly to allow the seam to "give" when the fabric is pulled.
THE FINAL REVEAL
Look at that! You have just engineered a set of Handmade Linen Napkins that are functionally superior to anything you could buy in a big-box store. The corners are sharp, the grain is straight, and the tactile feedback of the fabric is absolutely divine. These napkins are ready to handle everything from a messy Sunday brunch to a formal holiday dinner. They represent a perfect marriage of physics and art; a testament to your skill as a maker and your commitment to sustainable, high-quality living. Set the table and enjoy the satisfaction of seeing your work in action!
STUDIO QUESTIONS
Why does linen shrink so much during the first wash?
Linen fibers are under tension during the weaving process. When submerged in water, the fibers relax and return to their natural, shorter state. This relaxation shrinkage is a one-time structural recalibration of the cellulose bonds.
Can I use a regular needle for heavy linen?
No, you should use a Size 90/14 or 100/16 Sharp needle. A standard universal needle may deflect off the thick flax bundles, causing skipped stitches or damaging the internal fiber structure of the textile.
What is the best way to get a sharp crease?
Use a tailor's clapper. After steaming the fold, press the wooden block firmly onto the fabric. The wood absorbs the steam while the weight traps the heat, forcing the fibers into a permanent mechanical set.
Why should I choose linen over cotton for napkins?
Linen has superior moisture-wicking properties and is naturally antibacterial. Its fibers are longer and thicker than cotton, providing a higher tensile strength that allows the napkins to withstand hundreds of industrial wash cycles without degrading.
How do I fix a hem that is puckering?
Puckering usually occurs when the thread tension is higher than the fabric's ability to resist it. Increase your stitch length to 3.0mm or 3.5mm to allow more space for the linen fibers to settle between the needle penetrations.

