
Wet earth is the only scent that matters when you are elbow-deep in a fresh bag of stoneware. There is a specific, primal satisfaction in the way the cold slip clings to your palms as you begin wedging. If you are looking to elevate your botanical collection, crafting Handmade Clay Planters is the ultimate intersection of geology and interior design. We are talking about transforming raw, silicate minerals into a permanent home for your favorite Echeveria. The physics here is non-negotiable; you are balancing the hydroscopic nature of the clay with the structural demands of a vessel that must breathe. Think of the clay body as a skeletal system. If the grain direction of your coils is inconsistent, the kiln will find every single flaw and turn it into a hairline fracture. We are aiming for that perfect density where the walls are thin enough to be elegant but sturdy enough to withstand the internal pressure of expanding root systems. Grab your apron and let us get messy with some serious science.
THE STUDIO KIT
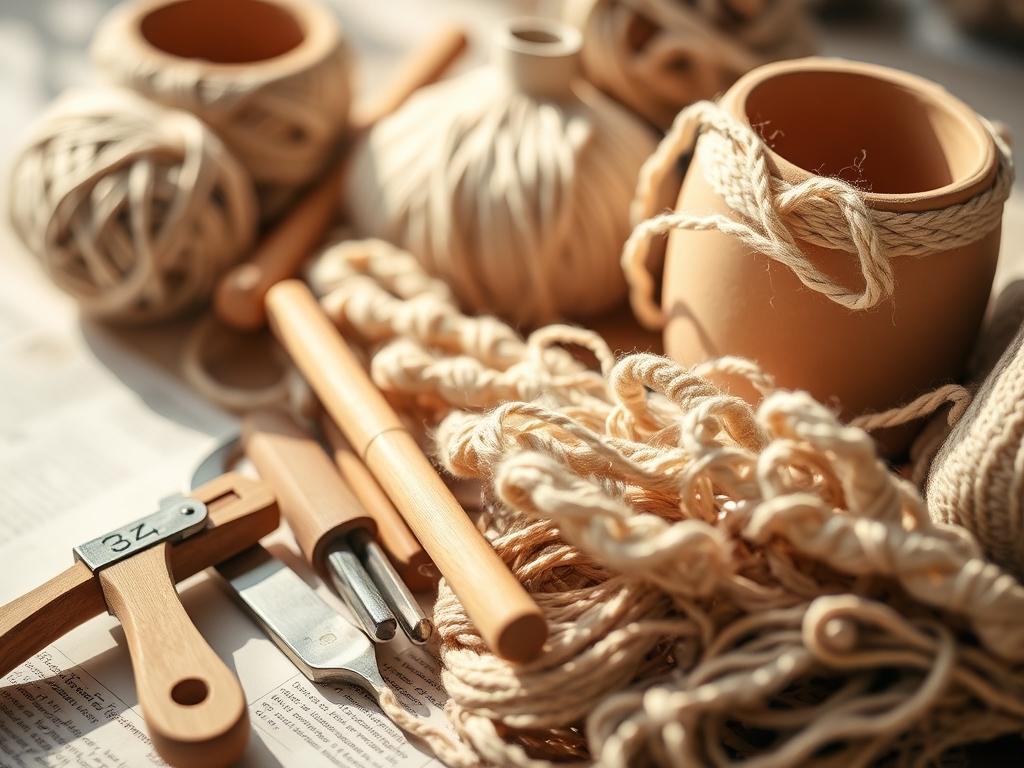
To master the art of the vessel, you need more than just mud; you need a precision toolkit designed for tensile strength and surface refinement. Start with a high-fire stoneware body containing at least ten percent grog. Grog consists of pre-fired clay crushed into a sand-like grit; it provides the structural "teeth" that prevent your pot from slumping under its own weight. You will need a wire clay cutter for portioning, a serrated metal rib for scoring joints, and a rubber kidney tool for final burnishing. For detail work, a needle tool or a fine awl is essential for venting air pockets.
If you cannot find professional stoneware, a high-quality terracotta is a viable material substitution, though it is more porous and will require a lower firing temperature. For those without a kiln, air-dry clay can mimic the aesthetic, but it lacks the vitrification necessary to hold water long-term. You would need to seal the interior with a liquid rubber or epoxy resin to prevent the organic matter from degrading the synthetic binders. Professional makers also keep a pair of calipers handy to ensure the rim diameter remains perfectly circular during the drying process.
THE TEMPO
The "Maker's Rhythm" is governed entirely by the evaporation of water. You cannot rush the chemistry of desiccation. Phase one is the Plastic State, lasting about two hours, where the clay is most malleable and responsive to your touch. This is followed by the Leather-Hard State, which usually occurs twelve to twenty-four hours later depending on your studio's humidity. This is the sweet spot for carving and refining. Finally, the Bone-Dry State takes three to five days. During this window, the clay loses its chemically combined water and becomes incredibly brittle. If you fire a pot that still contains microscopic moisture, the steam will expand and cause a catastrophic structural failure in the kiln. Patience is your most important tool.
THE CORE METHOD
1. The Foundation Slab
Start by rolling out a base slab to a consistent gauge of approximately one-quarter inch. Use a rolling pin with guide sticks to ensure the thickness is uniform across the entire diameter. A uniform base prevents uneven shrinkage, which is the leading cause of "S-cracks" in the bottom of Handmade Clay Planters.
Mastery Tip: Always compress the particles of your slab with a smooth rib tool. This aligns the clay platelets in a flat, overlapping structure, significantly increasing the tensile strength of the floor.
2. Building the Walls
Construct your walls using the coil method or a wrap-around slab. If using coils, ensure each layer is fused to the one below by scoring a cross-hatch pattern and applying a thin layer of slip (liquid clay). This creates a mechanical bond that mimics the grain direction of natural stone.
Mastery Tip: Use capillary action to your advantage. By keeping your slip slightly more hydrated than your walls, the drier clay will pull the moisture in, "locking" the two pieces together at a molecular level.
3. Refining the Silhouette
Once the form is assembled and has reached a soft leather-hard state, use a metal rib to shave away excess material. This process is called burnishing. You are essentially forcing the smaller clay particles to the surface, creating a skin that is less permeable and more resistant to thermal shock.
Mastery Tip: Focus on the structural integrity of the rim. A slightly thickened rim acts as a compression ring, preventing the walls from warping inward as the clay shrinks during the firing process.
4. Applying the Earthy Glazes
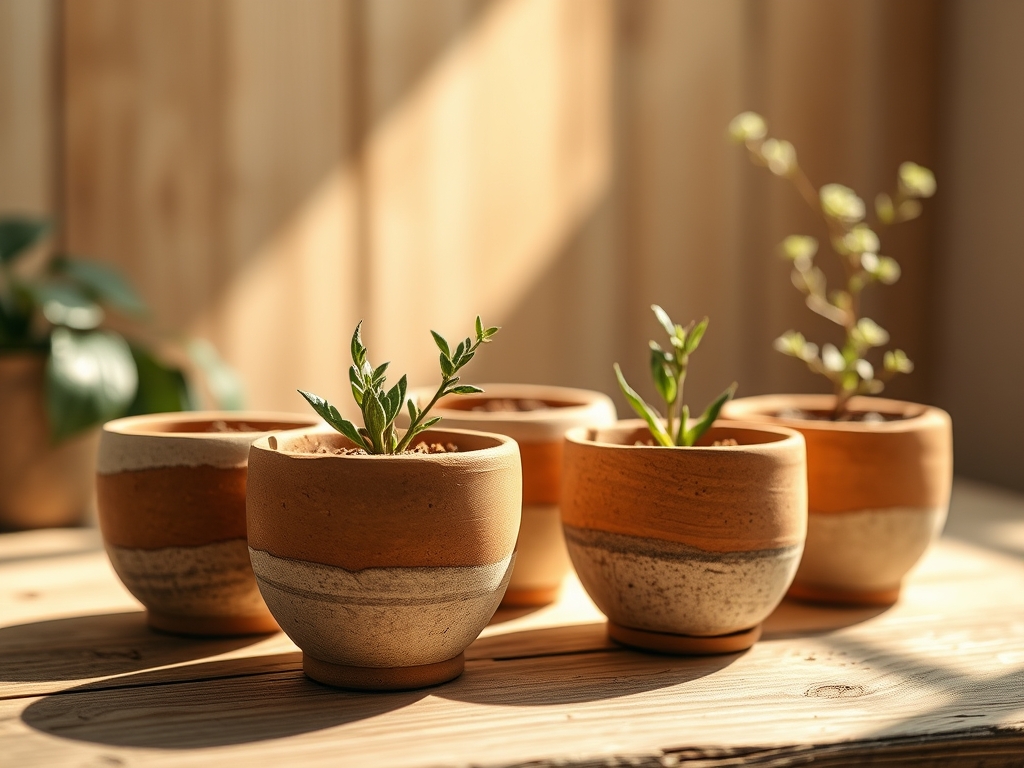
Select a glaze with a high matte content or a "breaking" quality that highlights the texture of the clay. For succulents, five incredible options include Iron Lustre, Ancient Jasper, Oatmeal, Seaweed, and Birch. These glazes contain metal oxides that react with the heat to create variegated, organic patterns.
Mastery Tip: Understand surface tension. When applying glaze, the liquid must "wet" the surface evenly. If the pot is dusty, the glaze will crawl, leaving bare spots. Always wipe your bisque-ware with a damp sponge before dipping.
THE TECHNICAL LEDGER
Maintenance & Longevity: To ensure your planters last decades, avoid rapid temperature shifts. While stoneware is durable, the coefficient of thermal expansion means the glaze and clay body expand at different rates. Sudden frost can cause the glaze to craze or pop off.
Material Variations: For a premium finish, mix five percent manganese crystals into your clay body. This creates a "speckled" look that mimics granite. For a sustainable approach, reclaim your scrap clay by drying it completely, crushing it, and re-hydrating it; this "closed-loop" system ensures zero waste in the studio.
The Correction:
- Cracked Bottoms: Usually caused by uneven drying. Fix: Dry your pots upside down on a wire rack to allow airflow to the base.
- Glaze Running: The glaze was applied too thick or fired too high. Fix: Use a grinding stone or an oscillating tool to remove drips from the foot.
- Warping: The clay was too wet when moved. Fix: Use a "bat" (a wooden disc) to carry the piece so you never touch the walls directly.
Studio Organization: Store your unfinished projects in a "damp box" (a plastic bin with a layer of wet plaster at the bottom). This maintains a one hundred percent humidity environment, stopping the drying process indefinitely so you can return to the piece whenever inspiration strikes.
THE FINAL REVEAL
There is nothing quite like the moment you crack open the kiln and see those muted, earthy tones shimmering against the raw clay. The transformation from a grey, muddy lump into a sophisticated, vitrified vessel is pure magic. Your Handmade Clay Planters are now ready to house those succulents, providing a breathable, pH-neutral environment that mimics their natural desert habitats. The weight of the stoneware feels substantial in your hand; the texture is a perfect tactile contrast to the fleshy leaves of a plant. You have successfully engineered a piece of functional art.
STUDIO QUESTIONS
Why do my clay planters crack while drying?
Cracking is usually caused by uneven evaporation. If the rim dries faster than the base, the resulting tension pulls the clay apart. Cover the piece loosely with plastic to slow the process and ensure a uniform moisture release.
Can I make planters without a kiln?
You can use air-dry or polymer clay, but they are not naturally vitrified. To make them water-resistant for succulents, you must apply a waterproof sealant to the interior to prevent the moisture from the soil from softening the walls.
What is the best clay for outdoor planters?
Stoneware is the superior choice for durability. It is fired to a high temperature, making it non-porous and "frost-proof." Terracotta is beautiful but remains porous, meaning it can absorb water and crack during freeze-thaw cycles.
How do I prevent glaze from sticking to the kiln shelf?
Always leave a "wax resist" or bare clay area at the bottom of your pot. This is called the foot. Without a clean foot, the molten glass in the glaze will fuse your planter permanently to the kiln.
What are "breaking" glazes?
Breaking glazes change color or transparency over textures and edges. They are perfect for handmade pieces because they highlight the ergonomic curves and carved details of your work, creating a sophisticated, multi-tonal look with just one bottle.

